Simple But Classy Look Make-up

by

11 July 2019

Beauty

Classy Makeup

If you’re looking for a simple but classy makeup look, there are a few steps to follow that will help you achieve just that. Whether you want to adopt a basic and elegant look for a special occasion, such as an engagement, wedding, reunion, or another occasion, there are certain guidelines that will help you achieve a sophisticated look for almost any event. Here are some basics to get you started.

In the following section, we speak to leading experts at the Paris Lash Academy and ask them about the best simple and classy make-up looks that you can opt for. Paris Lash Academy offers various eyelash extensions that can complement your looks.

Simple But Classy Makeup Look:

Makeup Brushes:

Classy Makeup

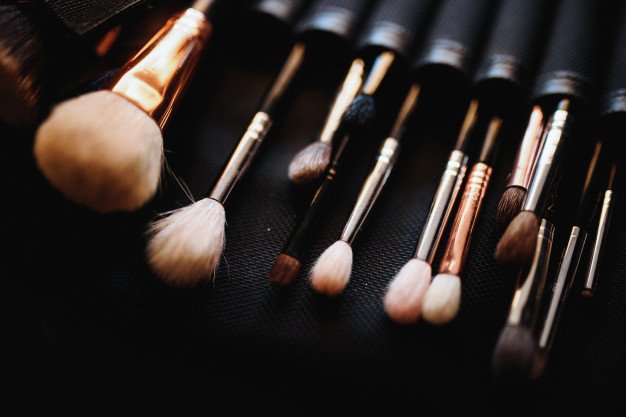
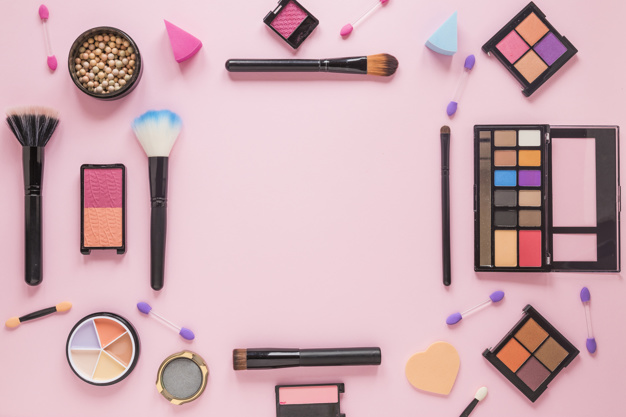
Before you get started on your simple but classy makeup routine, be sure and gather a set of quality makeup brushes to speed up the process. You’ll likely need foundation, blush, eyelid, powder, and contouring brushes. You might also want to think about including a few beauty blenders, particularly for foundation, blush, and contour application. You want a smooth application and the right brushes and blenders can provide that.

Prepping Skin:

Prepping Skin

In order for makeup to blend as it should, cleanse your skin to create a slight exfoliating effect before any makeup is applied. Once cleansed, moisturize the face and apply a face and eyelid primer. Primer applications should smooth and preserve any makeup that is applied to those areas.

Evening out Skin Tone:

Skin Tone

If the skin is blotchy or uneven, the application of a sheer tinted moisturizer will help to smooth and even out skin tone. Tinted moisturizers can also add warmth to the complexion. You don’t have to go for an exact skin match with a sheer tint as you can still bring an added intensity or glow to the skin. If your skin is extremely oily, you’ll probably want to skip the tinted moisturizer step to avoid oil buildup.

Concealing Under-Eye Circles and Blemishes:

Evening out skin tone also means including and using a good concealer that is rich in pigment and staying power. You want to cover dark under-eye circles and other blemishes. Using too much will accentuate problems, so simply use a short swiping motion under the eye. When dispensing the concealer, place it in a triangular shape under the eye. Blend the area with your finger or a beauty blender. For blemishes, dab the actual spot and blend. Continue to do the same action if added coverage is necessary. You want the concealer to be at least one to two shades lighter than your skin tone. Other spots to highlight include going up the bridge of the nose and on up to the forehead.

Foundation:

The right foundation is the piece de resistance of any makeup routine. You want to find a shade that is closest to your actual skin tone and decide whether a liquid or cream is suitable for your skin type. For a more flawless look, use a beauty blender to apply the foundation. It will definitely deliver a smoother and more complete coverage. Blend the foundation on the face and continue down onto the neck area. If necessary, use your concealer again to cover any blemishes or dark areas, or to add further accents.

Contouring/Highlighting:

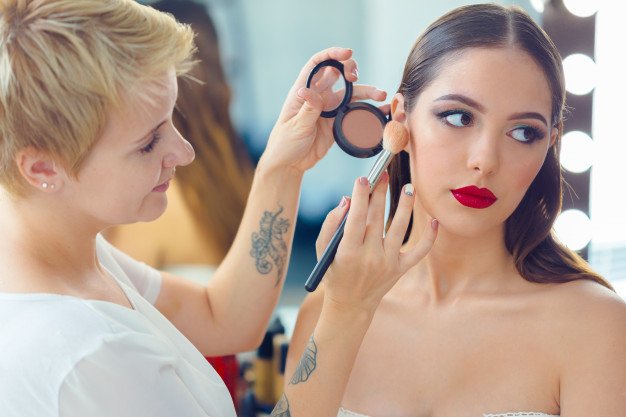
Once the foundation phase is complete, use a contour brush to apply contour powder or cream under the apple areas of the cheeks. Also, apply that same contour to the forehead area and both sides of the jaw. In order to add more warmth, apply a bronzer to those same areas.

Blush Color and Highlighter:

Blush Color

For added color, choose a blush color for a simple but classy makeup look. You want to think about using cream blushes in warm peaches and pinks so that skin is given a natural and subtle look. Forego cool pinks as they add too much drama. Natural cheek colors can convey a blushing bride kind of appearance that can enhance just about any luvbridal wedding ensemble as well as any other special occasion or event.

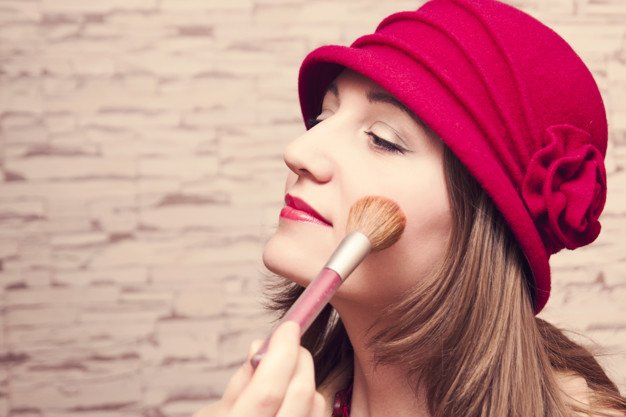
Use a blender or brush to apply blush to the apples of the cheeks. For more cheek and face enhancement, add a non-sparkly highlighter to the tip of the nose and cheek areas and anywhere else where the sun would normally hit. Again, use a beauty blender to smooth out both the blush and highlighter to create a more subtle and simple effect.

Eye Shadow, Liner, Mascara, and Eye Pencils:

Soft browns are the best eyeshadow colors to use to enhance the eye area and its shape. Select a shade that is a bit darker than your skin. Brush and blend the shadow into the creases of the eye as well as on the lower lashes. Keep it soft with no hard lines. Add a neutral creamy color shadow at the inner corners of the eyes as well as at the center of the lids, and on the brow bones. At the outer corners of the eyes, use a darker shade to bring a further dimension to the eyes.

Liner – Apply a dark brown or black liner to the eyelids. Liquid and gel liners give a longer, starker and lasting effect while pencils usually bring a softer and smoother look.

Mascara – provides a finishing touch to the eye area. Apply several coats to the top lashes. For lighter lashes uses brown mascara and if you have darker lashes, use brown or black. Avoid mascara products that produce spidery lengths to lashes, as they can detract from a more natural look. Mascara can also be used on your bottom lashes by applying a bit of mascara from the wand and placing it right at the roots of the bottom lashes using a small eye brush to dot in the mascara.

Eyebrow pencil/gel – color choices should be one or two shades on the darker side for blonde or light brown hair, while one or two shades lighter for dark or black hair. You want your brows to be natural but you also want them to be defined. Use an eyebrow template if you are not sure of how to color in your brows or simply need a guideline for correct color placement. Think soft and subtle, yet defined.

Lips:

Lips

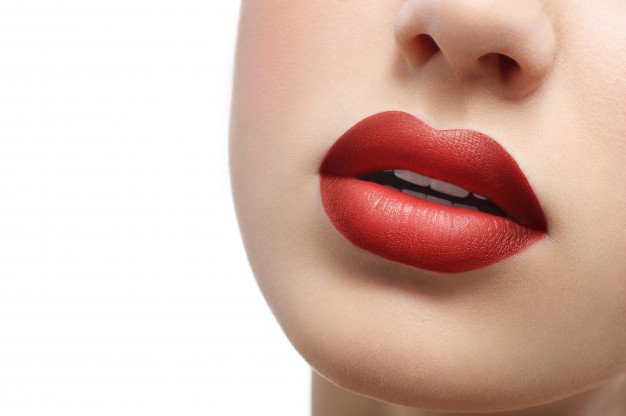
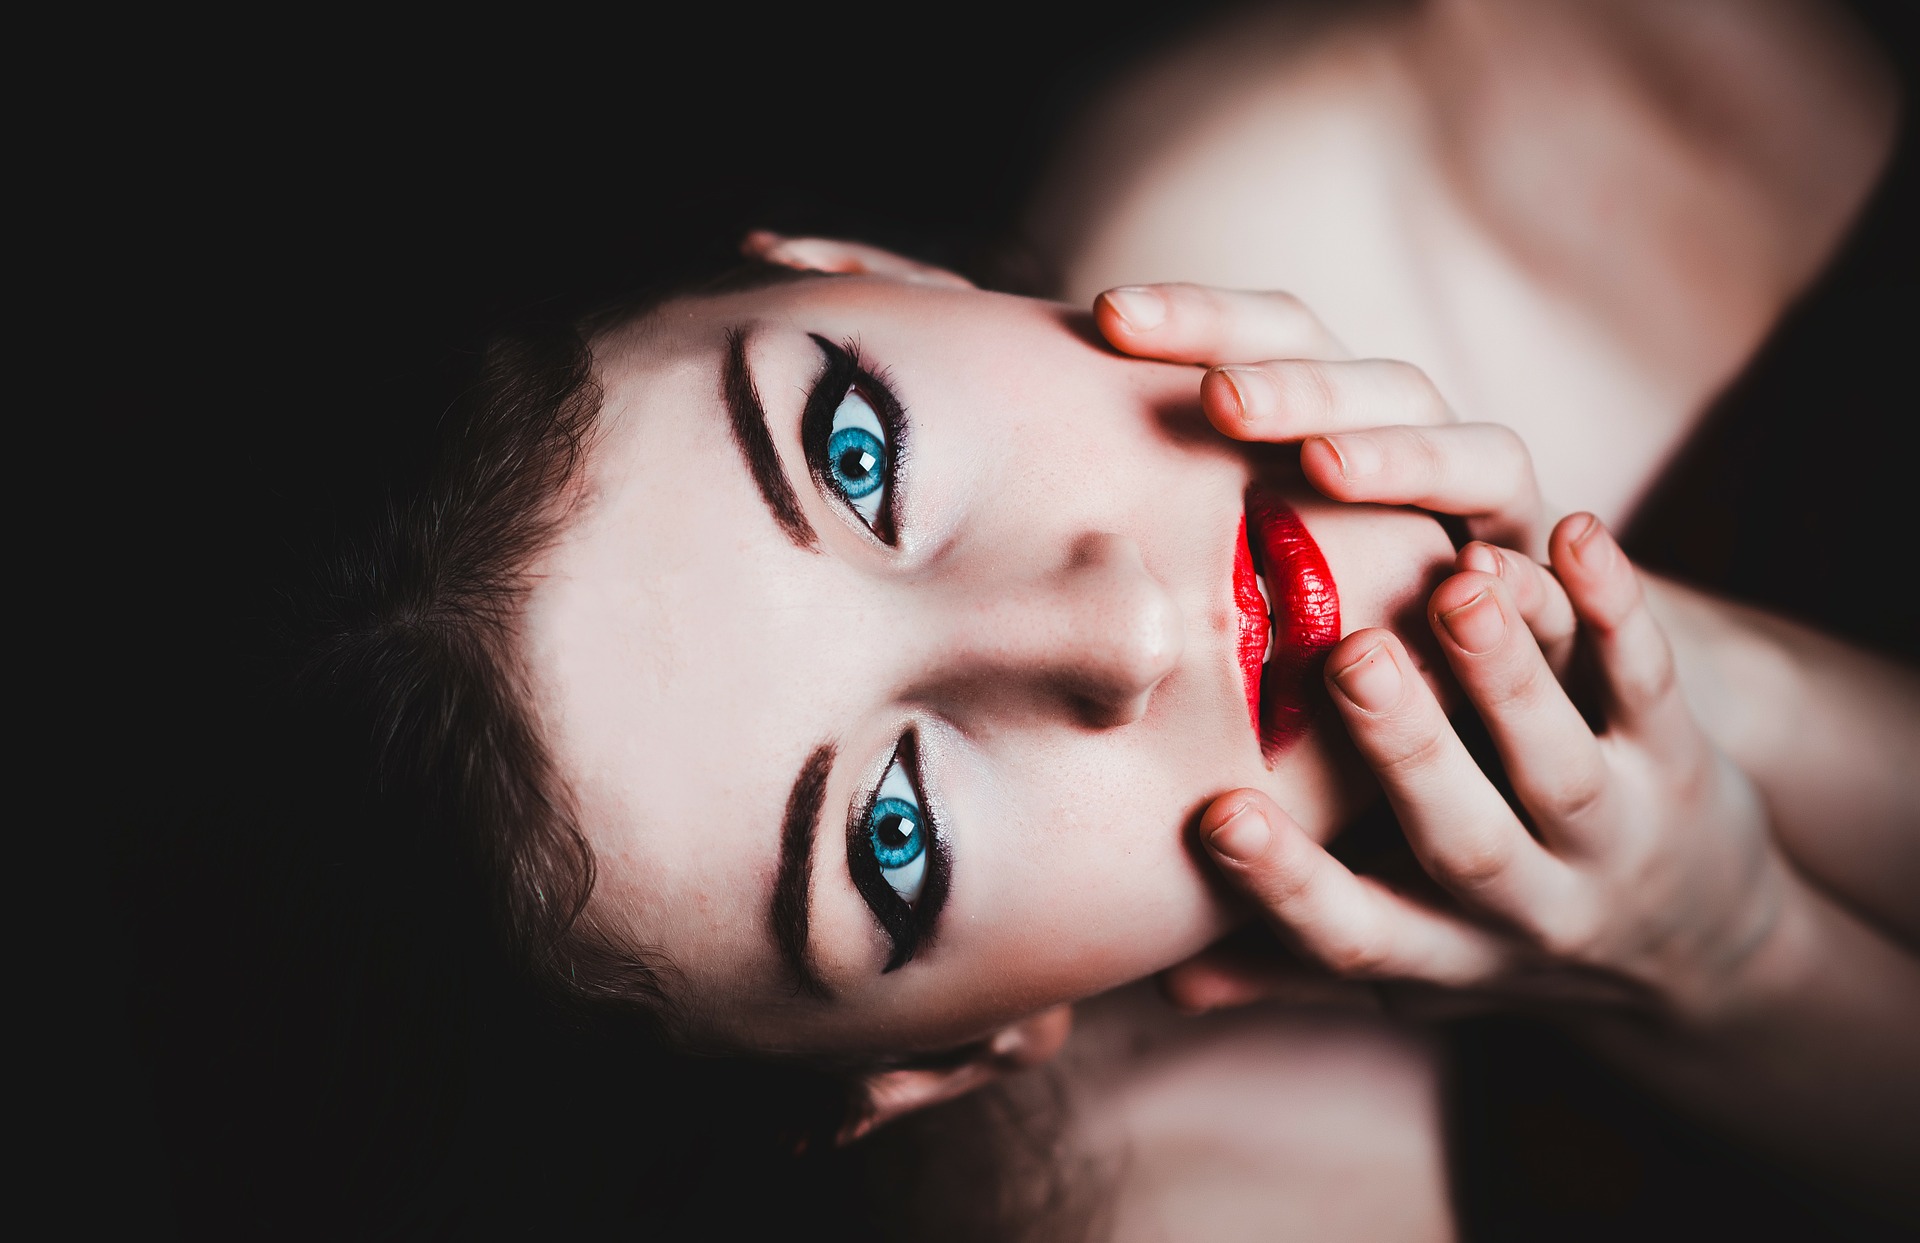
You want to enhance your lips with a pretty lasting tint rather than an outlandish and garish color. Choose a shade that actually matches your true lip color and pat or press the color into the lips. Go to the center of the lips first and blend the color in an outward motion. Darker berry colors and reds are flattering in a matte tint as they do bring emphasis to the lips without exaggerating them.

Powder:

Maybe you don’t require powder to finish your look but if your skin has a tendency to get oily and produces shiny spots, you might want to think about an oil-absorbing powder. Powders that are pressed, silk, airbrushed, translucent, and hydrating are great for completing any look, whether your skin is oily or otherwise. These powders are easy to use as you can just sweep a powder brush across them and buff the skin to create a perfect look, which includes powdering the under-eye area as well. Pores and blemishes are also reduced with the use of this kind of powder, and touch-ups are easy as the buildup is almost nonexistent.

Setting or Fixing Spray:

Once your makeup is completely done, use a setting or fixing spray to hold your work of art in place. Whether you choose it in spray, powder, or mist form, it is designed to maintain your makeup for a number of hours to all day. It helps you avoid those frequent powder room touch-ups that are annoying and a hassle. There are specific types to use for both oily and dry skin.

Creating a simple but classy makeup look can be fun and enhancing and if you have a few steps to follow, the process isn’t then difficult. Take a look at the steps here and give yourself a simple but classy makeup makeover. Just remember not to overdo it.

Read Also:

I enjoy writing and I write quality guest posts on topics of my interest and passion. I have been doing this since my college days. My special interests are in health, fitness, food and following the latest trends in these areas. I am an editor at Content Rally.

View all posts

Leave a Reply

Your email address will not be published. Required fields are marked *

Related

can you dye wet hair

Can You Dye Wet Hair? Here Is The Reason For It

Many questions are arising associated with washing the hair and drying, but now the most frequent question that comes to your mind is, can you dye wet hair? Yes, it sounds a little bit different than the usual hair fashion-related question. But the answer indeed is yes, you can.  Some hairstylists think dry hair dyeing can improve your hair texture naturally, and the end result is more natural than coloring dry hair. The wet hair dying technique is called wet balayage. This is a similar hair-dying technique to dry balayage techniques. Only here is a simple difference. It only applied to wet hair. Why Do You Want To Dye Wet Hair? The dying of wet hair may not be a common practice, but when we are talking about the comparison with dry hair coloring, here are some positive effects of wet hair dying. The dye of the wet hair is the best to work for achieving a subtle result. The hair damage is less than usual dry hair coloring. If you want to apply any semi-permanent hair color, then this technique is the best. The hair color promotes better absorption on the wet strands. The semi-permanent hair colors are more Ammonia-free. This type of coloring is becoming less harmful to your hair. Wet hair coloring promotes the natural hair look. This dying wet hair is a more user-friendly approach when you are dying your own hair at your home. These all are the basic positivity of applying the color on the wet hair. When you want to dye your hair at home, wet hair dying is the most user-friendly and time-consuming procedure. All you have to do is just apply the color in the middle of the bath; after that, wash it off. Benefits Of Dying The Wet Hair When you are applying the hair color at home, wet hair colorings are the best possible way to get the desired result. If you have any queries about you can dye wet hair? Then here is the list of multiple benefits of dying wet hair. 1. The Wet Hair Strands Are More Absorbent  The wet hair strands are more absorbent than the usual dry hair. The hair color easily melts into the hair, and more easily, you will get the desired color look. The equal distribution of the color is also an attractive part of the wet balayage coloring. The color of the hair is distributed equally after the applications. The color change is quite simple. The hair color does not give you a drastically changing look. But if you want a good coverage color or anything which is a permanent hair color, then this color is not for you. The temporary and the demi temporary colors are working best as the wet color. Both of these colors have very less harmful substance init. 2. Best Hair Colour When You Are A Beginner When you are a just startup color applicant, then the wet color is the best-suited hair color. The beginners are more prone to make a mess when they are applying the color. The wet color is just covering all messes.  First, shampoo your hair and then apply the dye to the wet hair. This will give you a more subtle result. These semi-permanent and semi-permanent hair colors are not working well on greasy hairs. This technique is quite easy and time-saving rather than the other coloring techniques. The working professionals and the people who do not have much time to go to the salon are more comfortable using this technique. 3. Gives You A Natural Flowy Look When you are asking the question, can you dye wet hair? Then the first answer which comes to our mind is yes. Not only yes, but the more natural and flowy look is also given through this type of coloring. The implementation is simple, and the drastic change of the hair color can not be found with the use of these temporary hair colors. You can expect mild color and a soft texture change of the hair. The distinctive funky colors are better to work as the wet hair color. How Can You Dye Wet Hair? We all call this dying technique the wet balayage. This technique is simple and effective, and long-lasting more than your expectations. Here are the four simple steps of applying the dye to wet hair. Step1 Wash your hair by applying the shampoo. Step2 Do not use the conditioner, serum, or any oil after washing the hair. Step3 Then just pat dry the wet hair. Step4 We need a damp surface to apply the hair color. Step5 Check the ingredients list before applying the hair color on your wet hair. As wet hair is more fragile than dry hair. Better to use semi or semi-permanent hair color for your hair. When our hair is in the wet state, the hair’s inner cortex layer is also open, promoting better absorption. Step 6 Read the instructions which are written on the package before starting the hair dying application. Step 7 Then wear a pair of gloves. Step 8 And take an amount on the small bowel as per your requirements. Step 9 Then apply the hair color with the applicator brush. Step 10 You can apply the color to the small sections of your hair.  Step 11 You can also apply the hair color just like any hair care product. Step 12 Apply a good amount of color because, with every wash, it will become lighter.  Conclusion The wet hair dye applications are easier to apply on the hair. These hair colors are less harmful with respect to the other type of hair dyes. The wet hair colors are more for the hair’s benefit and for improving the texture of the hair textures. Can you dye wet hair will no longer be a worry for you if you follow the mentioned points. But it also has some disadvantages. You have to choose the correct hair color for you, which has a less harmful substance within it. If you need simple temporary hair color, then these hair colors are the best time-saver for you. Therefore, I have tried my best to give you answers on how can you dye wet hair and the reasons for the same. You can also mention some more in the comment sections below.  Read Also: How Many Jobs Are Available In Real Estate Investment Trusts? How to Download Game Of Thrones Putlocker Online for Free? 0123Putlockers And Servers – Watch Movies Online Is Real Estate Investment Trusts A Good Career Path?  Which Type Of Portfolio Might A Young Investor Who Is Not Afraid Of Risk Choose?

READ MOREDetails
What Causes Black Triangle Teeth

What Are Black Triangles Between Your Teeth?

Celebrities with bright smiles are now more popular than ever, which may lead people to start noticing their teeth's cosmetic problems. Black triangle teeth are one of the most common dental problems people don't address or pay attention to. You can check for yourself if you have black triangles between your teeth. Smile with your teeth exposed in front of a mirror. If you can see any black areas between your gums and teeth, you have black triangle teeth or gingival embrasures. They are initially harmless, but they can be dangerous if not treated immediately. It's important to understand how they develop and what you can do to treat them. What Are Black Triangle Teeth? These black, triangle-shaped gaps between your gums and teeth are known as open gingival embrasures. They are usually associated with dental habits, age, and bone injury. They are also called black triangle teeth, which occur when your teeth and gums don't fill the gaps between them. Black triangles between teeth are a common problem; nearly 76% of adults over 20 have black spaces between their teeth, according to a study.  Food debris and plaque can accumulate in these gaps, making teeth susceptible to cavities and gum infections. The risk increases the more a person doesn't practice good oral hygiene. Most want to fix them for cosmetic reasons and to keep their teeth and gums healthy. What Causes Black Triangle Teeth? It is important to see your dentist immediately to discuss how to treat this condition. They will use your dental history and the cause of your black triangle teeth as their guide in recommending treatments that best address it. According to sunrise-dentistry.com, some of the reasons black triangle teeth occur are: 1. Receding Gums Gum disease, infections, age, and smoking can lead to gum recession and thinness. Bacteria exposure and tooth decay can lead to cavities and other infections. Getting help immediately from a dentist is important if you find gaps between your teeth, regardless of their size. 2. Aggressive Dental Hygiene Techniques Brushing or flossing too hard can damage the tissues between your teeth. Using a toothbrush with the right head size is also important; a toothbrush with a large head can make the gaps between your teeth larger. 3. Fragile Gum Tissue Every person's gum tissue thickness and stability are different. Experts believe that thinner gum tissues are less resistant to dental procedures. If you have fragile gum tissue, getting fullness back after dental implants will not be easy. 4. Teeth Shape Apart from the gum thickness, each person's tooth shape also differs. A person with triangular-shaped teeth is more likely to develop black gaps. Their teeth have wider biting surfaces than their bottom part near the gum line. 5. Mistakes During an Orthodontic Procedure Black triangle teeth and other dental conditions can develop when an orthodontic procedure goes wrong. Small gaps can also form when teeth shift into new positions. You may need to repeat your dental treatment or visit a more reliable dentist. How To Get Rid Of Black Spaces Between Your Teeth? Now that it's clear that the black gaps between your teeth are not just cosmetic issues, it's best to learn how to eliminate them. Consult your dentist before making any changes in your lifestyle or treatment for your dental health. They can help you understand the nature of your dental condition and determine the best approach to manage them. According to the British Dental Journal's study, patients have several treatment options for the black triangles between their teeth. Safe surgical techniques like pinhole surgery repair and tissue transplantation to preserve gumsTissue engineering, where dentists use regenerative cells to restore gum tissueHyaluronic acid treatment to reduce black gaps between teeth and volumize gum tissuesUsing prosthetics made of composite or porcelain with a pink shade to bond teeth and conceal the appearance of black triangles between teethInstalling a removable gingival cover to close the triangle spaces between the teethRepositioning or reshaping teeth to reduce or eliminate the black spaces between them Proper Dental Hygiene and Black Triangle Teeth Brushing and flossing your teeth every day will help prevent gum disease, blackening of your teeth, and other serious conditions. Routine dental checks help you know how your lifestyle choices impact your dental health and help your dentist check for early signs of dental problems. The American Dental Association has developed guidelines for how to brush your teeth and perform interdental cleaning. They also recommend using a toothbrush with soft bristles. Key Takeaway The black triangles between your teeth are more than just a cosmetic problem. They are caused by oral health problems like receding gums, aggressive oral hygiene techniques, and fragile gum tissue. Mistakes during an orthodontic procedure and the shape of your teeth may also cause black triangles between your teeth. You should consult your dentist about them; they are the best people suited to help you determine the best course of action to take. They can also address the dental problems causing the black triangles between your teeth. Additionals: What Canadians Should Know About Teeth WhiteningImportant Routine Dental Care Procedures to Improve Your SmileWays to Avoid Dental Problems by Keeping Dental Plaque and Tartar AwayDental Implants, Teeth Whitening in Reasonable Price in a Professional Dental Centre

READ MOREDetails
Outdated PR Tactics

Outdated PR Tactics You Should Avoid

If you spend even just a short time working in the PR industry, you will understand right away that one of the greatest challenges you will face as a professional is figuring out how to keep up with the latest trends. You must quickly understand not just the newest trends, but how to properly utilize them to your client’s advantage as well. If you aren’t able to pull that off, then you’ll be stuck playing a perpetual game of catch-up against competitors that will do everything in their power not to fall behind. A potentially even greater threat to your mortality in the PR industry is failing to avoid outdated PR tactics. Nothing is worse than making your client appear out of touch and that’s why Nancy at Behrman make a conscious effort to always stay on top of the PR trends and steer clear of the ones that have fallen out of popular use, such as the ones listed below. Relying on Conventional Press Releases Is a Thing of the Past: An article posted on Forbes states that “the age of the standard press release is no more,” and that’s a hard point to contest. While it can be argued that press releases are handy guides that members of the media can use to sort through the details of a huge corporate announcement, the reality is that all that info that can be contained inside a press release can be disseminated in other, more effective ways. Instead of using a conventional press release, companies can do something more exciting like releasing a teaser trailer for a new product or perhaps attempt to generate interest through their apps. With so many communication channels available to companies, asking them to talk to their prospective customers using a press release will only work to undersell whatever it is that they are planning to offer. Your goal as a PR professional, whether you’re working for Nancy at Behrman or any other firm, is to generate excitement for your client, and a conventional press release just isn’t designed to do that anymore. Offering Too Much Information can Backfire: Due in part to companies having so many ways to communicate with their customers these days, there is a temptation to just make every bit of content available to them 24/7. This may have seemed like a good idea in the not-so-distant past when companies were still busy trying to show prospective customers that they could get the hang of using all the new media, but now, it’s a practice best avoided. As Axia pointed out, posting everything online can lead to the release of “unstructured, random content,” and that’s exactly what you want your client to avoid. Aside from your client minimizing the impact their content releases could have by doing things that way, they also risk losing the interest of their potential customers. Releasing content online is obviously something a company must do, but serving bite-size pieces of interesting information is a better move than dumping everything right away, as the people at Nancy and Behrman can tell you. By creating a little mystery, you are giving people more reasons to remain interested in your client as opposed to the other companies that may be offering something similar. Mastering public relations is a tough ask for anyone, though figuring out what not to do for your clients is an important first step. There are many other techniques that can keep customers interested in a particular client, and the folks at Nancy and Behrman know how to utilize them well. Read Also: 8 Expert Ways To Build Your Personal Brand On Twitter! Steps for Improving Your Instagram Strategy

READ MOREDetails