


Category: Dev & Design
ContentRally is a leading source of reliable news and trending topics on Dev Design. Get hard-to-find insights and advice on Dev Design from industry-specific leaders.

A Beginner’s Guide To Playwright Inspector
As the world continues to shift towards a more digital landscape, the significance of quality web applications has become progressively apparent. Given the vast array of tools and technologies at the disposal of web developers, determining an appropriate starting point can prove challenging. Debugging is the method of identifying and fixing bugs or errors in software. It is a vital aspect of web automation testing as it contributes significantly to the dependability and precision of the automated test results. Playwright is an open-source cross-browser testing framework released by Microsoft in 2020. As stated by Systems Sciences Institute, the expenditure of addressing an error or bug discovered after product release was 4 to 5 times higher than pinpointing it during the configuration phase. The detected value during the maintenance phase can be exceeded by up to 100 times. Playwright developers operate at the API level and offer comprehensive tooling through the integrated Playwright Inspector. Playwright Inspector is a powerful tool that authorizes developers to efficiently test and debug their web applications. Also, it facilitates creating automation scripts by furnishing auto code generation capabilities. Playwright Inspector allows you to inspect the Document Object Model (DOM) structure of a webpage, interact with web elements, and inspect CSS styles utilizing the Playwright API. It authorizes stepping through tests, picking locators, editing live locators, and seeing actionability logs. This blog will dive into the basics of Playwright Inspector and explore its many features. So if you're ready to take your web development skills to the next level, buckle up and dive into the world of Playwright Inspector. Before that, let's have a brief understanding of Playwright. What is Playwright? Developed by Microsoft, Playwright is an end-to-end open-source web testing and browser automation framework. Playwright offers outstanding cross-browser compatibility and convenient features. This makes it a perfect choice for automation and quality assurance purposes. The playwright is a flexible, robust, and efficient framework. It supports multiple languages like JavaScript, Java, Python, C#, and TypeScript. Playwright utilizes a single automation API. This makes it steadfast and quick and produces consistent outcomes while running cross-browser testing. It provides a powerful set of testing features. These features can be utilized to simulate end-user interactions with the web application. Also, the framework authorizes testing complex scenarios such as file uploads, login flows, and other interactions. These test scenarios can be tough to test with other testing frameworks. The software platform furnishes developers with a comprehensive selection of standard and personalized locators. This facilitates the straightforward and effective identification of elements on web pages. These locators can pinpoint elements based on a variety of attributes, including text content, position on the page, and other distinguishing features. With Playwright locators, developers can confidently identify elements on the DOM, ensuring the creation of substantial and steadfast test suites. What is a Playwright Inspector? Playwright Inspector is a Graphical User Interface based tool that helps testers and developers record scripts and debug Playwright tests. The tool helps generate boilerplate code. This can be a suitable starting point for building codes. Also, it assists developers and the Quality Assurance teams save time when writing the test script from scratch. Software developers can utilize the time saved to comprehensively understand the codebase and make informed modifications, as required, to enhance the efficacy of the testing suites. The Playwright Inspector simplifies the process of debugging web applications. It is a browser-based development tool that facilitates developers to inspect, debug, and troubleshoot web applications. The tool authorizes developers to record user interactions, capture screenshots, and inspect HTML elements, CSS styles, and JavaScript code. Playwright Inspector furnishes a console for developers and testers to run arbitrary JavaScript code in the context of the inspected page. To scale Playwright Inspector, an AI-powered test orchestration and test execution platform like LambdaTest offers an online farm of 3000+ browser and OS combinations to execute the Playwright test. You can effortlessly test your application as its scalable cloud infrastructure enables parallel test execution where you can run test cases altogether. It can also integrate with your existing testing infrastructure. It effortlessly plugs into your Playwright tool, eliminating the need for complex configurations. LambdaTest's Playwright Inspector empowers you to debug and analyze Playwright scripts effortlessly. Inspect element properties, verify page behavior, and optimize automated tests using this user-friendly tool. Installation and Setup Instructions Installation and setup instructions are crucial for any software tool, and Playwright Inspector is no exception. As a beginner, it's essential to follow these instructions carefully to ensure that you can start using the tool without any issues. To install Playwright Inspector, first, you need to make sure that you have Node.js installed on your computer or laptop. Once you have Node.js, you can install Playwright Inspector through npm by running the command "npm i -g playwright-inspector" in your terminal. Upon successful installation, the tool can be initiated by executing the command "playwright-inspector" in your terminal. You can also use Playwright Inspector with other browsers like Firefox and Safari by installing the corresponding browser extensions. Following these instructions will give you a smooth and hassle-free experience of using Playwright Inspector, authorizing you to debug and troubleshoot your web applications with ease. How to Inspect Elements in Playwright Inspector If you are new to Playwright Inspector, you may be wondering how to inspect elements within your web page. Fortunately, Playwright Inspector comes equipped with a number of useful tools and features to assist you in efficiently identifying and inspecting elements on your web page. To start, simply launch Playwright Inspector and navigate to the web page you want to inspect. Once you are on the page, right-click on any element within the page and select "Inspect element" from the context menu. This will bring up the Playwright Inspector pane, where you can view the HTML and CSS code for the selected element. You can also view any associated styles and properties. From there, you can use the various tools and features within Playwright Inspector to further inspect and manipulate the element, making it easier than ever to identify and troubleshoot any issues within your web page. Benefits of Playwright Inspector The Playwright Inspector tool presents lots of benefits. Let us consider a few pivotal benefits of the Playwright Inspector: 1. Easy Debugging: Playwright Inspector facilitates the process of debugging Playwright scripts by furnishing a visual interface. This authorizes developers to inspect the page, make alterations to its state, and swiftly identify the cause of issues. 2. Record and Replay: The tool presents a record and replay feature that authorizes testers and QA teams to record end-user activities on the page and replay them for debugging purposes. The record and replay feature can help pinpoint issues that may occur only during specific user interactions. 3. Robust Logging: Playwright Inspector presents robust logging abilities that authorize testers and QA teams to outline the execution flow of the test script. This helps swiftly determine issues and fix them, thereby enhancing confidence in the code and application itself. 4. Intuitive Interface: The Playwright Inspector boasts an intuitive and user-friendly interface that is simple to navigate and operate, even for testers and QA teams who are new to the Playwright platform. 5. Cross-Browser Support: The Playwright Inspector facilitates the testing and debugging of applications across various platforms as it supports multiple Chromium-based browsers such as Chrome, Edge, and Firefox. This enables developers to ensure their applications perform optimally on different browsers. 6. Breakpoints: The Playwright Inspector tool is designed to enhance the testing process for software testers and QA teams. With this tool, users can set breakpoints in their test scripts, enabling them to pause test execution at specific points and thoroughly investigate the page's state. This increased level of control and visibility allows for improved efficiency and effectiveness in the testing process. Best Practices for Using Playwright Inspector The Playwright Inspector tool furnishes developers with an intuitive solution for testing web applications at scale. With the help of Inspector, developers and testers can debug their web automation scripts, view page elements and attributes, and pinpoint issues that may be causing the tests to fail. To make the most out of this tool, it is paramount to follow the best practices for using it. Here are eight best practices for using Playwright Inspector: ● Familiarize yourself with the Inspector UI. ● Utilize the search feature to swiftly pinpoint page elements. ● Utilize the highlight feature to visually locate elements on the page. ● Utilize the console to test JavaScript code and interact with the page. ● Utilize the network tab to inspect network requests and responses. ● Utilize the performance tab to pinpoint performance issues. ● Utilize the snapshot feature to capture a snapshot of the current page state for later analysis. ● Utilize the playback feature to replay test scripts and identify errors. By following these best practices, you can utilize Playwright Inspector to its full potential and optimize your web automation testing process. Conclusion Playwright Inspector is a powerful tool that can help developers troubleshoot issues and enhance the quality of their web applications. With its user-friendly interface and wide range of features, Playwright Inspector is a prominent addition to any developer's toolkit. By following the steps outlined in this beginner's guide, you can start utilizing Playwright Inspector today and take advantage of its many benefits. Whether you are a seasoned developer or just starting out, Playwright Inspector is a must-have tool for anyone looking to enhance their web development skills. Read Also: Mobile Testing With Appium On Lambdatest 10 Reliable Free Currency APIs For Your Business Using Tracking Code, Google Analytics Can Report On Data From Which Systems?
READ MOREDetails
Fast Track to Uploads: Speeding Up WordPress File Handling
In the bustling realm of WordPress, a swift and seamless user experience is paramount. And nothing sets the tone quite like rapid file uploads. Picture this: your website visitors eagerly await engaging content, but sluggish file handling dampens their enthusiasm. In this blog, we delve into the pivotal role of fast upload files in elevating WordPress usability. It will help us upload file fast on WordPress. We'll unravel the vexing challenges that often throttle upload speeds, from server limitations to bulky media. Enter the Filestack WordPress Plugin – a potent solution primed for advanced file management to upload file fast. Brace yourself for insights that propel your WordPress uploads into the fast lane. Hence, fostering unparalleled user satisfaction. What Are The Methods To Assess The Speed And Efficiency Of File Uploads? Assessing the speed and efficiency of file uploads involves several methods. One common approach is measuring upload time. It calculates the duration it takes to transmit a file to a server. Bandwidth utilization is another method. It involves analyzing how much of the available network capacity is utilized during the upload. Throughput evaluation involves assessing the amount of data successfully transferred per unit of time. Network latency measurement helps identify delays in data transmission. Tools like Ping, Traceroute, and online speed tests also provide insights into upload performance. For more information, please visit the website, This Vid. What Are The Bottlenecks In The Current Upload Process? The current upload process faces several bottlenecks that hinder efficiency and user experience. Network limitations often result in slow transfer speeds. Hence, frustrating users and delaying content sharing. Inadequate server infrastructure further compounds the issue, leading to processing delays and interrupted uploads. File format compatibility issues create additional obstacles. Furthermore, it necessitates time-consuming conversions. Cumbersome user interfaces and authentication procedures add complexity. Hence, discouraging seamless uploads. What Is The Impact Of File Size And Format On Upload Speed? File size and format significantly influence upload speed. Larger files require more time to transfer. Hence, causing delays and straining bandwidth. Complex formats require additional processing before uploading, further slowing the process. Optimizing file sizes and using efficient formats can enhance upload speed. Hence, ensuring smoother data transmission. How To Optimize The Server Environment For Faster Uploads? To optimize a server environment for faster uploads, start by meticulously analyzing server configurations and settings. Fine-tune parameters such as upload limits, buffer sizes, and timeouts. Implement server-side optimizations like compression and caching to expedite file processing. Utilize asynchronous processing and parallelism to handle concurrent uploads efficiently. Opt for high-performance storage solutions and consider Content Delivery Networks (CDNs) to distribute load. Regularly monitor server performance. Hence, diagnosing bottlenecks and adjusting configurations accordingly. How To Enhance Network And Connection Speed? Enhancing network and connection speed involves various strategies. Optimizing router placement, updating firmware, and reducing interference is vital to improve bandwidth and stability. Content Delivery Networks (CDNs) expedite file transfers by distributing content across multiple servers globally. This minimizes latency and accelerates data retrieval. Optimizing network protocols like TCP/IP and HTTP enhances data transmission efficiency. Prioritizing Quality of Service (QoS) settings for critical applications, employing data compression, and minimizing background processes further amplify network performance. How To Utilize Asynchronous And Parallel Uploads? Asynchronous upload techniques within WordPress can significantly enhance user experience and optimize performance. Asynchronous methods upload files in the background. Hence, allowing users to continue their tasks uninterrupted. To further expedite the process, parallel uploads can be employed. Hence, enabling multiple files to be transmitted simultaneously. Concurrency challenges meet through efficiently managing upload queues. Hence, ensuring seamless handling of simultaneous requests. Combining asynchronous and parallel strategies accelerates upload times and ensures smooth user interactions. Why Do We Need File Compression And Format Considerations? File compression is pivotal in our digital landscape, offering multifaceted benefits. Primarily, it slashes upload times by condensing data without compromising quality. This is crucial for seamless data sharing, a cornerstone of modern communication. Alongside compression, selecting judicious file formats is equally vital. Opting for efficient formats expedites transfers, which is especially vital when bandwidth is a constraint. How To Integrate Filestack WordPress Plugin? The Filestack WordPress Upload plugin facilitates hassle-free file uploads from local and cloud drives. Simply insert the [Filestack shortcode] into your post to define where the file should appear. Display files promptly, benefiting from the optimized page load time courtesy of Filestack CDN. Crop and edit images within the uploader or use file transformations to enhance media assets programmatically. Store files in Filestack's cloud storage or your preferred location. Filestack features seamless integrations, multi-file and large file uploads, in-app image transformations, asynchronous uploads, integrated CDN, and cloud storage compatibility. Installation Process Follow these steps to get started: Place the plugin folder into the /wp-content/plugins/ directory. Activate the plugin via your WordPress dashboard's 'Plugins' menu. Input your Filestack API Key. Use the shortcode [filestack] within a blog post or page to showcase the upload button. Alternatively, click the Filestack button in the Media section to initiate file uploads. Opt for "Insert Into Post" to add the CDN resource seamlessly. How To Perform Real-Time Monitoring And Performance Measurement? Real-time monitoring and performance measurement are critical for optimizing upload performance. Employing dedicated tools and plugins helps track upload speed, promptly identifying bottlenecks. Leveraging performance analysis tools allows real-time visualization of data throughput and latency. Regularly analyzing these insights enables data-driven decisions for enhancing upload speed. Swift interventions can be made, such as optimizing network configurations or upgrading hardware. Continuous monitoring ensures sustained improvements, creating a cycle of refinement. Read Also: The Best WordPress Plugins For Marketers Conclusion In the fast-paced digital landscape, optimizing WordPress file handling is paramount. Upload speed enhancements become a reality through diligent monitoring and strategic employment of performance analysis tools. Real-time insights illuminate bottlenecks. At the same time, continuous monitoring fosters a cycle of refinement. By embracing data-driven decision-making, organizations unlock the potential for rapid improvements. This dynamic approach ensures efficient uploads, fostering a seamless user experience and bolstering website credibility. Embracing the fast track to uploads becomes a strategy and a necessity for WordPress success. FAQs How Can I Upload Files Faster? Optimize network settings, use compression, and employ efficient file formats for faster uploads. How Can I Send 25 GB Files For Free? Utilize cloud storage services like Google Drive or WeTransfer for sending large files up to 25 GB for free. How Can I Send 100GB Of Files For Free? For free, use cloud storage services like Google Drive or Dropbox to send large files up to 100GB. How Can I Transfer 100GB Of Files Faster? Utilize high-speed internet, compression, and dedicated file transfer tools for swift and efficient 100GB transfers. Read Also: 4 WordPress Plugins to Make Your Blog More Powerful Why is WordPress Hosting Ideal for WooCommerce Websites? 10 Best Premium WordPress Themes 2017
READ MOREDetails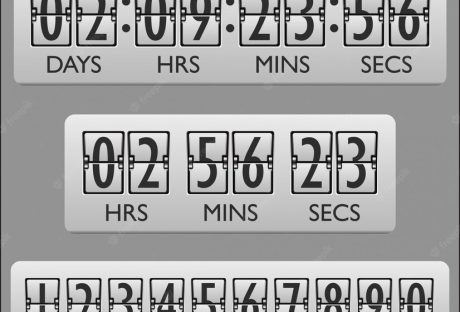
Interactive Website Tools: Exploring Strategies For Engagement And Conversion
Beyond the aesthetics of modern web design lies a realm of functionalities designed to entice, intrigue, and encourage action. It's not just about displaying information anymore; it's about creating a dynamic dialogue between the site and its visitors. From clever countdown widgets that build anticipation to popups that capture attention at just the right moment, interactive tools are redefining the digital journey. As you embark on this exploration, you'll discover how these tools can be the key to not only attracting eyeballs but also driving tangible results. So, are you ready to unlock the next level of online engagement and conversion? Let's dive deeper. Interactive Tools For Websites: Why It Is Crucial In the vast universe of the Internet, websites often face the challenging task of standing out amidst a sea of competitors. It's no longer enough to simply be online; success hinges on how well a website can interact with its users. This is where interactive tools make a monumental difference. The Link Between Engagement And Conversion Every click, scroll, or hover on a website tells a story — a story of a user's journey from a curious visitor to a potential customer. Engagement is the first step in forging a connection. When visitors are actively interacting, they're investing their time and emotion into what the site has to offer. This active participation paves the way for conversions, whether it's signing up for a newsletter, making a purchase, or any other desired action. Simply put, higher engagement can often translate into higher conversion rates. Benefits Of Interactive Features For Visitors And Businesses For visitors, interactive features offer a personalized, immersive experience. Instead of passively consuming content, they're invited to participate, making their online journey more memorable and impactful. Whether it's a quiz that offers tailored product recommendations or a chatbot providing instant support, these features make the user feel valued and understood. For businesses, the advantages are manifold. Interactive tools can lead to increased dwell time, providing more opportunities for branding and message reinforcement. They offer valuable insights into user behavior, preferences, and pain points, allowing businesses to fine-tune their strategies. Pioneering Engagement Tools: A Closer Look Delving into the world of pioneering engagement tools reveals a medley of innovative strategies designed to enthrall users and drive conversions. Here's a closer look at some game-changing tools that have redefined the way we interact online. Countdown Widgets How They Work: At its core, countdown widgets for websites are digital timers, ticking away the seconds and minutes of a particular event or deadline. Be it heralding the launch of a new product, highlighting the end of a sale, or marking the start of a webinar, these widgets play on human psychology. The ticking clock creates a palpable sense of urgency and anticipation, compelling users to act before time runs out. To maximize the effectiveness of countdown widgets, it's crucial to employ them judiciously. Overuse can desensitize users to a sense of urgency. Moreover, always ensure that the event or deadline you're counting down to holds genuine value for the user. Pairing the widget with compelling visuals and concise, action-driven text can further amplify its impact. Popups [caption id="" align="alignnone" width="2400"] SOURCE[/caption] Different Types Of Popups: Popups are versatile tools that can serve various functions. Informational popups. These are designed to update users about essential website changes or privacy policies. They're typically concise and straightforward, ensuring users are informed without overwhelming them. Promotional popups. They are the digital equivalents of storefront sale signs. These might advertise a limited-time offer or discount. Feedback popups. They might ask for star ratings, brief comments, or even detailed reviews, helping businesses understand their strengths and areas of potential enhancement. Email subscription popups. These popups invite users to stay connected by subscribing to newsletters, updates, or exclusive offers. Exit-intent popups. Triggered when the system detects a user is about to close the tab or navigate away, exit-intent popups present a final, compelling offer or message. The key to popups is moderation. Bombarding users with incessant popup messages can swiftly turn intrigue into irritation. Timing is crucial. For instance, an exit-intent popup can be a last-ditch effort to retain their attention. Similarly, understanding the user's journey can help in strategically placing popups for maximum effectiveness without being intrusive. Interactive Surveys And Quizzes Surveys and quizzes engage users actively, making them feel part of a two-way conversation. When a user takes a quiz, they're not just absorbing information; they're sharing insights about their preferences and needs. This enables websites to tailor content and offers precisely to the user, enhancing relevancy and driving engagement. Beyond personalization, these interactive tools are goldmines of data. By analyzing responses, businesses can pinpoint audience segments, refine product offerings, and sharpen their marketing tactics. In essence, every user interaction becomes an opportunity for businesses to learn, adapt, and evolve. Live Chat Features Live chat serves as a digital concierge, connecting users with businesses in real time. No more waiting on hold or navigating through tedious email threads. With just a click, users can pose questions, raise concerns, or simply chat, fostering a sense of immediacy and personalized attention. Gamification Elements Games aren't just for fun; they're powerful engagement drivers. By incorporating gamification elements like points, badges, or leaderboards, websites transform mundane tasks into exciting challenges. Whether it's completing a profile, sharing content, or making a purchase, gamification rewards users for their actions, making their digital journey feel more like an adventure than a chore. User Testimonials And Reviews Nothing vouches for a brand like the voice of its customers. User testimonials and reviews provide an unfiltered glimpse into real experiences, offering prospects both validation and reassurance. These authentic narratives, beaming with praise or constructively critical, solidify a brand's credibility, paving the way for trust and long-term loyalty. Avoiding Overwhelm: Less Can Be More In the intricate dance of digital engagement, it's not always about having more tools, but about wielding them wisely. While it might be tempting to incorporate every interactive feature available, bombarding users with too many stimuli can lead to cognitive overload. It's like walking into a room with blaring music, flashing lights, and a crowd vying for your attention all at once. The key is to curate and prioritize. A well-placed popup can be effective, but combine it with constant notifications, quizzes, and live chat prompts, and you risk alienating the user. Remember, the goal is to guide and engage, not to overwhelm. By being discerning in our choice of interactive elements, we can ensure that users not only stay but also enjoy their digital journey.
READ MOREDetails
Special Stock Motion Graphics Effects
Video content is more popular than ever before. Netflix has popularised the idea of binge-watching our favorite TV shows while video-sharing social platforms like YouTube and TikTok have seen the format reach new heights. While more people are watching videos today, we’re also seeing more people creating them. This is due to both the availability and accessibility of modern video editing platforms and the ease at which they can be uploaded online and shared with the world. If you want to start making your own videos, making use of motion graphics can be a fantastic way to stand out from the crowd. Let’s take a look at some of the best special stock motion graphics effects and discuss how they can be used in your videos. 1. Lower thirds As the name suggests, lower thirds of motion graphics appear in the lower third section of your video. These play an important role; they can be used to convey key information without distracting the viewer from what’s happening in the center of the screen. We see lower thirds of graphics all the time, often far more regularly than we realize. For example, when watching a news bulletin, the lower thirds of graphics are used for things like naming an on-screen speaker, summarising a current news story, or providing breaking updates from across the world. In the news, these lower-thirds graphics are referred to as chyrons. If you’re an amateur video maker, chances are you’re not going to be tasked with editing news shows for terrestrial television. So, what else can lower thirds be used for? On platforms like YouTube, growing a following of subscribers is important, and generating lots of comments and likes on your videos can help it perform better in search results and in recommended content. Lower thirds of graphics can be used as calls-to-action, encouraging viewers to subscribe to your channel, to like the video, or to comment and start a discussion among other viewers. Lower-thirds graphics can also be useful if you’re making informative content like tutorials. They can be used to convey further information to your viewers and to deliver tips, tricks, and reminders, without obscuring the primary focus of the video itself. 2. Overlays Motion graphics effects come in a huge variety of different styles, whether you’re looking for CapCut effects or Premiere Pro effects. One type of motion graphic effect you’re going to come across is the overlay effect. As the name suggests, overlay effects are placed over the main section of the screen, unlike lower-thirds effects which are localized to the bottom of the screen. What are overlay effects used for? This is a broad question, there is such a range of overlay effects out there, and each can be utilized to serve a different purpose. Text overlays are among the most common types. These place text directly in the center of the screen and can be used for transitioning between scenes or to deliver vital information to the viewer. Overlay effects can also include things like graphs, charts, and infographics. These are particularly common in corporate videos and in marketing material, they can be used to clearly and concisely convey complicated information in an engaging and informative way. Using an overlay effect can also be an artistic choice. They can filter footage to make it look more cinematic, with added depth and grain, or to change the color balance to suit the mood and atmosphere of your video. 3. CapCut CapCut is a video editing app made by TikTok parent company ByteDance. With over 200 million monthly users, it’s one of the fastest-growing apps in the world and is taking full advantage of the booming video creator marketplace. CapCut offers deep editing functionality, but the focus is on encouraging users to edit fun, engaging videos quickly and to share these across social media. One of the best ways to make your videos more engaging and to help them stand out in an increasingly oversaturated digital landscape is to use CapCut motion graphics. These can come in the form of small, animated figures that dance and move around, giving your content a playful, casual feel that will make your viewers feel happy and comfortable. CapCut motion graphics can also include things like arrows and pointers. These can be particularly useful for information tutorial videos, where certain elements might need to be highlighted to help viewers follow the tutorial correctly. 4. Slideshows Slideshows are perhaps the most basic form of motion graphics, but they still have a place in today’s world. Slideshows are simple sequences of images. They can be used to tell a story, convey a message, or simply show off some exciting, eye-catching images. Much of the creativity in slideshows comes from the transition effects used as one slide moves to the next. However, be careful not to overdo it with these transitions, as this can detract from the content of your slideshow. Conclusion Motion graphics are an incredibly important part of video editing. Use this guide to learn all about the different types and how they can be used in your videos. Read Also: Movavi Video Suite Review: A Comprehensive Tool to Create Videos Ways To Fix YouTube “Something Went Wrong” Prompt! The Ultimate Streaming Guide to Watch TV Online
READ MOREDetails
Simplifying Finance: The Role Of UX Design In Financial Services
Exposure to financial services in this busy economic market is sky-high. However, not every financial service is up to the mark with its customer-centric approaches. In turn, FinTech is the next big thing in the financial world. Digital platforms are engaged in interacting and perceiving with the users. The innovative capabilities of FinTech applications largely determine user experience (UX). To make financial services more accessible and approachable to users, ux design financial services are far better than traditional complex financial services. The world of digital finance might seem intimidating to many for its complex terminology and lengthy processes. Moreover, a lack of customer-centricity is the main concern for many while dealing with the complex economic market. Simplifying finance is best possible through “Humanizing FinTech,” which is largely convinced with UX design. What is UX design? Well, at the core, the main terminology here is to define an intuitive design to embrace a better user experience and bridge the gap between financial services and users. Prominent Roles Of Ux Design In Financial Services The pivotal experience of financial service should be ecstatic for the users. It cannot be complex and boring. Financial aspects are already boring, and things need to be easy with digitalization. So, FinTech, through UX designs, can be more accessible and engaging for the users. Every financial sector is trying to solve the users' problems and manage the people's concern. Apart from that, a financial service cannot be vulnerable to its security aspects. However, the best part is that UX designs can provide you with a streamlined process to simplify financial services and engage better digital finance to ensure security while bridging the services gap with users. Bridge The Gap One of the main roles of UX design is to eliminate the gaps between user understanding and financial services. UX designers want users to understand the financial concepts and also become intuitive to the processes. What do you want? A boring spreadsheet? Or a colorful graph with pie charts? No one wants a boring data sheet that is complex to navigate and also not eye soothing. In contrast, UX designers help accomplish financial tasks quite easily for any user. For instance, transferring funds, managing insurance policies, and considering stocks are different financial services, but UX designs make it all easy for you to understand and navigate. No one wants to increase their learning curves while using financial services. Common people do not use complex financial data. They are unaware of the critical financial exposures but need to manage their finances instead. So, if you are using an app, you would like to get some attractive features that are easy to understand and ready to help you with colorful approaches. Well, demystifying complex financial data and presenting it easily to the users is the foremost priority of a UX designer. Focusing On User Trust And Security The role of UX design in financial applications is fostering customer loyalty and creating a positive user experience. However, gaining the audience's or users' trust in the FinTech industry is quite tough. Well, a streamlined process is the only solution to generate an intuitive design for a better user experience. However, it does mean anything to gain the trust of the users. If you want to trust them, you must focus on creating a better security process. For instance, if you use a biometric authentication process like facial recognition or fingerprint scanner, it can generate a better user experience. These are the ultimate solutions to present a user-friendly approach in advanced ways to engage people in a non-intrusive way. Reinforcing the trust of the people is best possible with UX designs like encrypted notifications and secure connections. So, it is time for you to foster user experience and gain their trust. Streamlining The Complex Financial Process The biggest role of UX design is to transform the traditional banking process into a digital landing platform. Well, what are the features of the traditional banking process? Lots of paperwork. Lack of transparency. Lengthy approval times. However, with digitalization, things are changing. Financial sectors are becoming more and more efficient in dealing with the instances of consumers and getting friendly. This is where digital landing platforms efficiently manage your concern with various features. Real-time updates. Time efficient services. Ensures transparency. The whole approach of UX design is to provide you better user experience by analyzing the streamlining process. So, now the loan approvals will be quick through digital applications, and you will also get the best seamless experience. Engaging User Satisfaction The difference between UX designers and graphic designers is that UX designers follow a user-focused and multidisciplinary approach. In contrast, Graphic designers maintain the curves with specialized pixel-focused consequences. Apart from that, emotional design, creative thinking, and prototyping are the common responsibilities of these designers. It is hard to believe that 90% of people stop using an app due to poor performance. So, a positive user experience with better quality and usability is expected. Enhanced user satisfaction with customization may increase the retention rate for a financial service. For instance, if you are using a banking app, you would like to check your account balance or transact money quickly. Now if it has an easy-to-use interface and you can work on it quickly, then you would like to keep the app on your phone. Digital financial services are difficult to avoid in this fast-paced world but also cumbersome to use in many cases. Finding a better UX-designed financial service is always a better resolution to avoid inconsistency and engage proximity. Read Also: Guide to Hiring a WordPress Developer 7 Advantages of Using Website Design Templates Why Prototype Design Is A Way To Make Your UX Design Perfect
READ MOREDetails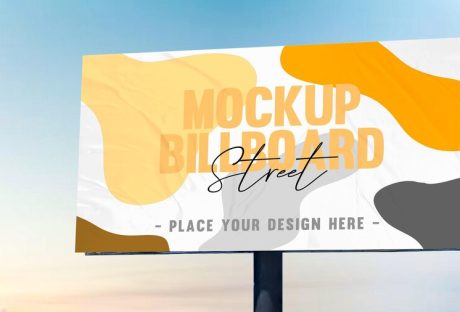
How To Design Your Custom Banner That Works
Whether you want to attract new customers or promote an event, a custom banner can be a powerful way to drive your message. But how do you design one that works? The first step is to consider your marketing goal. Once you know what you're trying to achieve, all of your other decisions will fall into place. Here Are Four Prime Steps To Design Your Custom Banner: 1. Colors When designing a custom banner, you want to be sure to choose colors that will help grab your audience's attention. The wrong colors can make your banner look dull, while too many can take away from your message. When it comes to choosing the right colors for your banner, the best approach is to use bright hues that stand out against a neutral background. These can be anything from radiant yellow to fiery red. A contrasting color like this makes your sign more eye-catching and helps potential customers identify it from a distance. It also helps create a visual hierarchy to help your audience better understand what you're advertising. For example, a fast food chain might use a combination of yellow and red for advertising its products because it's easy for people to recognize and remember. It's also a great contrast to the black background of their logo. You should also consider the type of font you'll be using for your custom banner printing. If your banner is intended for a small business, for example, it might be best to stick with plain text that's easy to read from a distance. If your banner is intended for an event, a more detailed font might be a good choice. However, if you're designing a one-time-use banner, it's best to avoid putting too much information on it. This is because people don't have time to read a lot of information at once, so it's important to keep it brief. Generally, you'll want to have a big font for your primary message and smaller text for any additional information, such as a description of an event or a contact number. The next thing you should keep in mind when choosing colors for your custom banner is how far the colors will be from each other. The farther the colors are from each other, the more likely they'll be to confuse people or distract from your main message. For this reason, it's important to choose a background color that compliments your business theme and a font that's easy to read. A quality online banner printing company can provide you with advice and recommendations for the perfect colors and designs for your business. 2. Typefaces Custom banners are one of the most effective advertising mediums for reaching new customers. But it’s important to design them right. This means choosing the best typefaces and keeping them simple enough to be read quickly by people driving by or walking by your store. The most important thing to remember when designing your custom banner is to choose a font that’s easy to read. There are many different font types to choose from, and selecting the right one can make or break your design. There are five main types of typefaces: Serif, Sans-Serif, Script, Condensed, and Italic. Each has a unique personality and can be used for different purposes. Serif typefaces typically feature slight decorative strokes at the ends of letters, which give them a traditional appearance. They’re popular for brands and products that want to create a sophisticated, classy, and trustworthy image. Another important consideration is the typeface’s weight. Font weights range from thin (also called hairline or light) to black, with a lot of different options in between. Using too thick or too thin fonts can make it difficult for people to read your message, and can even confuse them. Using too light or too dark can also have the same effect, so it’s crucial to know which option is most suitable for your needs. The best fonts for a custom banner are those that are easily readable in all sizes. For example, Verdana is a widely used typeface that’s easy to read on smaller devices. Sans-Serif typefaces are generally preferred for large banner signs that will be seen outdoors. These fonts are usually bold, but they can also come in regular and italic styles. They’re often used for titles and call-to-actions, but they can be a bit on the thin side when it comes to body text. If you’re planning on adding a lot of copy to your custom banner, it may be best to use a font like Quattrocento Sans. If you’re looking for a banner that mimics the look of typewriter letters, Veteran Typewriter is a good choice. This font is easy to read and emulates the typewriter letters that are commonly found in magazines. 3. Backgrounds If you want to make sure your banner is eye-catching, the background is a key component. You can choose from a range of options, including illustrations, color overlays, and custom backgrounds. When choosing a background, keep in mind that the size of the image will affect how it looks when printed on your banner. The best type to use is a vector file since these files can be scaled without losing image quality. It's also a good idea to save your design as a flattened file in Photoshop or Illustrator before sending it to a printing company. Another important consideration is glare. If the background of your banner is too bright or dark, it can cause your logos to appear distorted. You can avoid this by using an off-white color for your background, which will absorb light and minimize glare. It's also a good idea to choose a background that complements the main text and logos on your banner. This will ensure that your brand's colors stand out from the rest of the background, and your logos will pop. A background can also help convey a specific message, such as a call to action. For instance, if your business is based at an unremarkable location, a colorful banner could help you draw attention to your building and services. The right banner will communicate your message quickly and clearly. Whether you're promoting a new event or announcing a product launch, it's important to make your banner easy to read from a distance. This means avoiding fonts that are too chunky and contrasting colors and sizes. To design your custom banner, start by selecting a template from Canva's collection. Once you've done this, you can add images and other elements to your design. Before you start adding your elements, take some time to think about your message and what action you want people to take after they see your banner. This will guide the rest of your design and ensure that your message is clear and impactful. You can use Canva's free templates to get started on your design, or you can create a more professional look with a paid account. The site has thousands of images, so you'll be able to find the perfect one for your banner. You can even search for specific graphics if you'd like to incorporate a specific piece of artwork into your design. 4. Images If you're designing a custom banner for your business, it's important to use images that will grab the attention of viewers. The right images will help your message get across, entice people to visit your site and encourage them to take action. When designing a banner, you can either use a pre-made template or create your own from scratch. There are several factors that go into designing a banner, including color, text size and placement, and image quality. One of the best ways to make your banner stand out is to use contrasting colors. For example, a white background with red or yellow text will draw the eye. This will also make your message pop out in a crowd of competitors' ads. You can also add photos to your banner from the Web by using an online image editor. Kapwing, for example, is a collaborative image and video editing platform that allows you to use copyright-free content from huge image libraries like Unsplash and Pexels. Once you've selected the photo you want to use for your custom banner, resize it to fit your dimensions. You can do this by using the "Resize" button on the toolbar or by manually inputting the appropriate picture sizes. After you've resized the image, it's time to decide on a background color. You can choose a color that fits your brand's colors or another neutral shade that complements your design. You can change the color of your background in several places, including the Banner Styling menu and in your template's guide. When deciding on a background color, be sure to consider the opacity of your banner's text and graphics. A light background will make your text and graphics harder to read and will be less noticeable, while a dark background can help the elements of your banner stand out from the rest of the page. Once you've finished selecting your background color, it's time to add text to your banner. You can add text with the Text tool (the big letter "T" in the toolbar), or by clicking on the banner to access its text editing bar. This way, you can add any text to your custom banner and modify its size, fonts, and colors. Read Also: How To Make Sure You Get The Best Service From Your IT Supplier 5 Content Ideas to Use with Instagram Influencers 5 Benefits of Digitalization in Marketing
READ MOREDetails
Key Differences Between A Web Flow Designer And Editor
Webflow is a website-building platform that provides a user-friendly interface, enabling users to design and develop websites without programming knowledge. Webflow offers a wide range of features to make the website-building experience enjoyable and efficient. Two commonly used tools in Webflow are the Webflow flow designer and the Webflow editor. Although they are both integral parts of the Webflow platform, they are quite different. Thus, understanding the key differences between webflow editor vs designer will help you to make the most of the Webflow platform. This article explores the key differences between web flow designers vs editors. Webflow Designer Overview Webflow Designer is an intuitive, easy-to-use tool for creating stunning websites. Its drag-and-drop interface makes it suitable for professional web developers and beginners. It is responsible for the design of the layout, colors, fonts, and other elements that constitute the visual appearance of your site. Users can customize their design using the extensive library of website design templates and components that gives them unlimited options for web design. You can also use this tool to customize your website to fit your needs and preferences by creating visual elements like buttons, images, text, headers, menus, and more without learning code or syntax. Additionally, Webflow designer allows users to add any desired functionality to their sites, giving them complete control over their website structure. Although experienced developers can further customize their design using CSS, additional tools are not necessary. Webflow designer gets the job done perfectly. Webflow Editor Overview Webflow editor is a content management system (CMS) on the Webflow platform. It allows Webflow developers to edit and manage website content. Its easy-to-use interface allows you to create blog posts, web content, page descriptions, and landing pages without a hassle. This tool is not tied to the website structure, so you can manipulate content without changing the site’s structure or design. As such, content managers and marketers can create and manage content on the CMS without accessing the site’s core elements. Moreover, you don’t need to consult the developers and designers to create or manage content. Thus, the CMS saves you time by reducing the points of contact and makes content management flawless. Webflow editor is also an SEO-friendly tool. It allows you to optimize your website content and pages for search engines, making ranking much easier. For instance, you can optimize the page URL, meta title, and description tags for your keywords. Doing so increases the visibility of your content to search engine crawlers and gives you an edge over your competitors. The Key Differences Between A Web Flow Designer And Editor WebFlow Designer and Editor are powerful tools that allow users to build and maintain a website. However, they are distinct in their core functions and capabilities. The two terms can be confusing, especially if you are a beginner on the platform. The following differences between web flow designer vs editor will help you distinguish them so that you can use them for the best web-building experience. Functionality Webflow Designer is a visual tool that lets users design their websites from the ground up. It has numerous features, such as drag-and-drop building, custom CSS and HTML control, and a wealth of pre-built blocks and elements. WebFlow Editor, on the other hand, is a content management system (CMS) that provides an interface for creating and managing content. It offers the ability to add, edit, delete, and sort content without altering the base design of the website. With the editor, users can add pages, posts, images, and other media items to their site and set up menus, sidebars, and other customizable features. Room For Coding One exciting feature of the Webflow designer is the drag-and-drop functionality that lets you create a professional-looking site even without coding knowledge. Nevertheless, the designer allows programmers to add their code to the existing templates. This option is excellent for customization, so you can tune your site design to fit your preferences. However, the Webflow cms editor does not have the option for additional code. The reason is that the CMS doesn’t require a user to change the website design or the core structure. You can add only content blocks such as text and images – that don’t need programming. Learning Curve Another factor differentiating Webflow designer vs editor is the training curve involved in learning the two tools. Although Webflow is easy to use, the Webflow designer is harder to learn than the editor. This is true, especially if you want to design a professional site. You might want to learn tools like CSS and HTML to create custom elements for your site. The Webflow editor is easier to use and doesn’t require learning many concepts. The CMS has user-friendly features that make content management less taxing. Collaboration Another factor to consider when distinguishing a Webflow designer vs editor is collaboration ability. The Webflow designer is for web developers and designers and does not allow members to collaborate when working on a site. On the other hand, the Webflow cms editor allows members of your marketing team to edit and optimize content. Content writers, SEO experts, and marketers can collaborate and undertake marketing campaigns, increasing efficiency and effectiveness. Final Thoughts Webflow is a user-friendly platform for building professional websites. It has two main tools – Webflow designer and editor that make modern web development easier than ever. The Webflow designer is responsible for the web design, while the editor is a cms for creating and managing website content. Read Also: Key Components for Your Marketing Stack How To Foolproof Your Digital Marketing Strategy? Why Email Marketing is the BEST Digital Marketing Outreach in Singapore
READ MOREDetails
10 Best Infographic Examples In 2022
The academics Mrudula Joshi and Latika Gupta have defined infographics as, “pictorial representations of information intended to disseminate information quickly and clearly”. Additionally, they state that the quality of an infographic is determined by its content and its visual appeal. Infographics are a useful way of conveying information visually and can be used in a wide variety of applications. Businesses often use infographics to convey information to their employees, shareholders, and the general public. Infographics use the language of visual media to convey information in a manner that is unique and can transcend language. This allows infographics to be very accessible which helps businesses convey information efficiently and effectively. Checkout Ten Best Infographic Examples In 2022: This article will analyze 10 of the best examples of infographics in 2022 and discuss the effectiveness of the infographics' use of visual language to convey information. 1. Wyoming LLC Attorney: Everything Owned by Nestlé This infographic breaks down the considerable number of brands that are owned by the multinational giant Nestlé. Through its use of simple outlines, it separates the brands into their different industries which makes visually reading the information easier. This also conveys the message behind the infographic which is that Nestlé’s brands are overwhelming the market and are not competing with each other but with brands that Nestlé does not own. 2. World Resources Institute: The Carbon Budget Source: World Resources Institute This infographic explains the carbon budget and its implications for society. This is a complex topic and it is effectively handled through a well-designed pathway that guides the reader through the infographic. This pathway is constructed in two ways: firstly the line which runs throughout the infographic and secondly through the gradual lightening of the background color. 3. World Bank: Climate Extremes, Regional Impacts, and the Case for Resilience This infographic illustrates the increasingly prevalent effects of global warming on people and places in Africa and Asia. The infographic uses color in a particularly effective manner. The orange and yellow hues contrast pleasantly with the shade of blue. Color psychology informs us that blue as a color evokes emotions of trust and orange evokes emotions of friendliness. The infographic uses both colors to create a welcoming but informative tone. Source: World Bank 4. Valentina D'Efilippo: Poppy Field Source: Valentina D'Efilippo This infographic uses the icon of the poppy to visually illustrate the number of deaths that have occurred during major conflicts since 1900. The size of the poppy represents the number of deaths that have occurred and the length of the stem represents the duration of the conflict. This is a visually striking infographic that creatively expresses statistics in a truly artistic manner. 5. Udacity: How to Pick Your First Programming Language Based on the Life You Want Source: Udacity This infographic breaks down the programming job market by programming languages as well as gives beginner programmers a better understanding of the application of different programming languages. The infographic uses a pleasant yellow background and subtle pops of color to distinguish between the different programming languages. This allows the reader to immediately know which language is being discussed without needing to check each time. Additionally, the infographic uses creative graphs which are both informative and aesthetically pleasing. 6. Arnav Sameer: The Six Principles of Design This infographic dissects the six principles of design and the individual components which make up these principles. The infographic utilizes the elements of design that it discusses to enhance its visual appeal. This is satisfyingly coherent and it drives home the message of the infographic. Additionally, the use of color is very limited but this only serves to enhance the aesthetic of the infographic. Source: Folography 7. Juan Martinez: History of Life Source: Juan Martinez This infographic presents the history of planet earth and life as we know it. It includes the different time periods of the earth as well as the positions of the continents and how they have shifted over time. It uses a strong circular design to draw the reader's eye to the center of the infographic. Additionally, further information is presented in a clear way that relates back to the central image. 8. Venngage: Netflix Font Psychology Source: Venngage This infographic analyzes the font that popular Netflix shows use for their titles. It breaks down the different categories of fonts and what these fonts say about the shows as well as their audiences. The infographic utilizes an almost black background to make its limited use of color particularly emphatic. This also functions as a means of placing a great deal of emphasis on the white text which reveals the font each show decided to use. 9. Dorothy: A History of Hip-Hop Source: Dorothy This infographic charts the history of the hip-hop movement using the style of a blueprint. It emphasizes the artists which have had the most significant cultural impact on hip-hop and link these artists to other prominent figures of the hip-hop movement. The design of the infographic encourages exploration of its intricacies through a web of interconnecting lines and bold use of only two colors. 10. Rick Slusher: The Architecture of Inception Source: Rick Slusher This infographic condenses the complex plot of the film Inception into a digestible and visually striking piece of media. Each line represents a character and the warped layers of the central shape represent the layers of dreaming that the characters experience. This infographic proves that almost anything can be represented visually in a clear manner, even something as convoluted as the plot of Inception. Final Thoughts This list has compiled the best examples of infographics and illustrated how diverse and creative the medium of infographics is. Each infographic manages to condense a great deal of information into an easily digestible and visually appealing piece of media. The use of infographics is tremendously diverse and these infographics demonstrate the manner in which the medium can be used for any number of purposes. Read Also: Is Instagram Algorithm Easy To Beat?5 Benefits of Digitalization in MarketingLatest Trends of Graphic Design in London
READ MOREDetails
The Benefits Of Custom Dirtbike Graphics
A dirt bike is an investment. The owner wants to protect this investment while making it their own. Customizable graphics kits provide an excellent way to ensure each bike reflects the personality of the rider. However, this is only one of several benefits of graphics kits. Find other benefits listed below. Checkout Five Crucial Benefits Of Custom Dirtbike Graphics: 1. Distinct Appearance Many people choose options from Senge Graphics because they don't want their bikes to look like the others. They want their bike to stand out in the crowd and be noticed. With many graphic packages to choose from, a person won't find it difficult to achieve this goal. The owner chooses the colors, patterns, and gradients. This means every rider can have a bike that is as unique as they are. When choosing these graphics, the rider must ensure those graphics are UV resistant. The decals only provide this visual appeal if they remain bright and glossy. Inexpensive graphics fade quickly and make the bike look old and neglected. Spend a little more to get quality graphics that last. 2. The Right Fit Another benefit of investing in quality graphics is they will be created to fit the specific make and model of the bike. The rider determines which parts of the bike they want to cover with graphics and purchases those pieces. This means they can cover any damage to the bike while leaving other parts exposed. Hide rust damage and scratches, knowing the decals will cover any marks with ease. This allows the bike to look new longer and present the right image. 3. An Affordable Option A person may wish to update the look of their bike without spending the money to have it painted. A graphics kit allows them to do so at an affordable price. One reason a person may choose to use graphics is they want to update their bike regularly. They don't want to have it in the shop being repainted, as this process takes time. Graphics can be applied in a matter of hours, making this ideal for people who like to feel as if they have a new bike every year or two. A new paint job requires multiple coats, and each coat must dry before the next one is applied. With graphics, a person applies them, allows them to cure, and begins riding again. 4. No Commitment A rider might find they need to secure new sponsors. The partnership with current sponsors isn't working out and they are ready to move on. However, the rider might hesitate to take this step because it means changing the graphics on their bike. Doing so is easy with the help of a custom graphics kit. They won't spend a lot of time and money updating the graphics when they make this move, which riders appreciate. It allows them to find partnerships that are beneficial for both parties. 5. Easy to Install Anyone who can read and follow directions will find they can apply dirtbike graphics. Preparation is key to a successful job, so make certain time and effort are put into this part of the process. The manufacturer includes instructions to follow, and the rider should review these instructions, as they do vary by the product. By following the specific instructions provided with the graphics kit, a rider finds the job is done right the first time. Look into custom graphics kits today. Many riders find they have ample kits to choose from for their dirt bike make and model. Customizable kits are also offered, so no rider has to do without. Learn more today to see which kit is right for your needs. Read Also: Purchasing a Road BikeAre You Thinking About Buying Quad Bike For Your Kid?8 Useful Tips to Help You Prepare For Your First Motorcycle Track Day
READ MOREDetailsWhy Prototype Design Is A Way To Make Your UX Design Perfect
You are now ready to launch a new product to the market- where do you begin? You must consider many factors before letting your customers try out your product. One of the crucial processes is known as prototyping. UX designers develop a model that will test its usability and evaluate its functionality – a functional app prototype. Many UX services offer are ready to help business owners and organizations develop prototypes. You need a professional UX team to work seamlessly, identify the product's gaps, and enhance user experience. As for app design costs, you can read more in Eleken’s article. If you want to launch any successful product, you need to employ the best UI and UX designers for the job. When it comes to interacting and engaging with tech products, user experience and interaction is a top pre-requisite. By working with the professional UX design agencies in San Francisco, you will be able to create better, more efficient, and productive products that are loved by your customers whether you operate in the B2B or the B2C niche. Besides enhancing product quality, prototyping mitigates the risks involved in web development. Therefore, creating a prototype is a crucial step in product development. It is a process that brings the design concepts to life. This article examines the importance of prototypes to show why you need to create one for your web product. What Is a Prototype? During web development, the UX team creates a model of the product. This mockup replicating user interaction is known as a prototype. It is a design phase that shows how the product will function from the entry point to the various sections. This layout helps the client to understand the design direction and the overall approach. The primary purpose of creating this mockup is to gather feedback and improve on the design flaws. However, the reasons might vary for many designers, depending on the project goals and business needs. You can use different design programs to create the mockups, such as Adobe XD, Sketch, Figma, and Webflow, among many others. But how do you know how to rate the quality of a prototype? An effective prototype has an appealing representation, accurate details, and interactive features. It is important to note that prototypes are not final; it undergoes continuous improvements depending on the user feedback. Why Prototyping is Important Since you now know what a prototype entails, let us explore why it is an essential process in user experience design. 1. Better Outreach to Clients The web development industry is quite competitive since many companies and large organizations want different web products. Thus, you can use a prototype to convince clients that your development team is up to the task and can deliver impressive products. Talk is cheap, and most clients will go for an agency with a realistic mockup of what they want. Your web design firm has a higher chance of landing a client if you develop a detailed prototype. This will show your commitment level and preparedness to accomplish the project. Besides, it is a fun process that brings out your creative side compared to written documentation. Therefore, develop a flawless prototype and land that huge product development contract to gain a competitive edge. 2. Accurate Feedback Developing a prototype is important since it saves you a lot of frustration in changing a product. Sometimes a client might come with different expectations after you have completed the development phase. These changes will consume time and resources that you could have avoided if you had a detailed mockup. Thus, it is advisable to have a prototype that displays the final product. It will help you gather accurate feedback and additional requirements from your client. They will have a better understanding of the final product. 3. Enhanced Design Process Creativity does not happen once; you have to change the first design until it suits your product objectives. Developing a prototype ensures you achieve the desired results. Prototyping does not need much time and money; thus, you can change it many times until you are satisfied. This iterative process will help you improve the model and create stellar products. 4. Better Project Planning Most design teams often focus on short-term goals to complete the tasks. This approach might be detrimental to the entire project because they do not plan it accurately from the beginning to the end. But developing a prototype solves this problem. You can plan your projects better since you have a precise idea of what you want and can accurately calculate the resources required for completion. 5. Client Satisfaction The product development process is transparent; the customer gives the product requirements, and the team does the work. After completion, the client checks the work and makes corrections or closes the project if they're satisfied. However, this model does not involve the client 100%, and there will be many communication gaps. Prototypes work much better as they encourage client interaction and allow room for communication. You can follow the progress and give intermediate feedback to avoid costly errors and revisions afterward. 6. Less Frequent Modifications Completing projects without prototyping might seem fast. Still, making any changes to an already finished product is expensive and frustrating, especially with a team of freelancers. It usually has negative consequences. Therefore, take time to create a mockup and engage the client for feedback before proceeding to the development phase. You can easily alter a prototype compared to a finished product. Thus, avoid these modifications by presenting a detailed prototype and confirming every essential aspect of dev work before it gets done. 7. Better Work Morale Many people love to procrastinate when a project arises. The team might postpone starting projects even at design agencies, especially if they don't understand the product and client's needs. But with a prototype in place, the team will be motivated to start the design process right away, as they have a set of workable tasks and milestones. 8. Stellar Final Product When the client gets a prototype, they provide feedback on improvements. This is an effective approach to making the web product better with every iteration. With ongoing changes and revisions of the product design, the team and the client better grasp the progress. They can continually revisit the initial specifications and make adjustments to stay on track with the original business idea. Even large-scale changes surfacing underway can be implemented quicker and cheaper at the prototyping stage compared to the final product's revision. Final Word The design phase is not complete without a prototype. Develop accurate prototypes if you want to create a top-tier product with an exceptional user experience. Thus, prototyping is a win-win situation, as your client will know what to expect from the final product, and the team will simplify the development process. Read Also: Guide to Hiring a WordPress Developer 7 Advantages of Using Website Design Templates Bootstrap Templates and Allied Tools to Make Your Web Presence Easy and Instant
READ MOREDetailsLooking To Build A Photography Website: Here Is How You Can Build One
Whether you are a professional photographer or someone that is just starting out, you need a website. To be honest, in the digital age, not having a website for a photographer is a serious disadvantage. You might think that showcasing your work on social media is enough. That is rarely the case. Social media has several restrictions. Photography is all about details. When you publish your work on social, the platform compresses the imagery and practically dilutes the experience. If you want your customers to seriously engage with you, you need to consider having an excellent website that can display your portfolio in all its glory. With a website, you can go with the highest resolution images, biggest sizes and demonstrate your sheer brilliance. The thing is. Where do you begin, and how do you get a website done with the least amount of effort and costs? In this resource article, we are going to help you do just that. If you are a photographer that is looking to build a new website or improve your existing one, stick around till the end. The Start of Building a Photography Website: Choose the Best Website Builders Building a high-performing photography website is not as tough as you might imagine. It is true that a decade back, that was not the case. You needed help from specialized web design agencies that would take months to deliver a website. Not to mention the unimaginable costs. In 2022, that is not the case. Photographers are creative professionals who value aesthetics. With a little bit of support from the best website builders, they can get their platforms up and go on their own. This is where Zyro photography website builder proves to be helpful. Template Selection- Building a photography website is different from creating one for a brand in the heavy equipment niche. You need appropriate templates that are aesthetic and attractive. A great website builder has multiple photography templates that you can go through and choose the ones that you feel best represent your personality and work. Creative Freedom- Working with an agency means listening to their design experts and their complicated jargon all day long. You are not going to face this issue with a website builder. Here you have complete freedom to decide on the sections, flow, and placements. Great options like ‘drag and drop’ enable you to have creative freedom and make decisions on layouts, color schemes, and more. Zero Distractions- Building a website earlier required you to have knowledge about coding, HTML, CSS, and PHP. This was a major deterrent. Not anymore. Using a website builder frees you from all these distractions and allows you to build a photography website like you want to. If you do not want to code, no one should force you to do that. This allows you to focus on the website. List of 5 Essential Things Photography Website Owners Need: You might have heard experts say that simply building a website is not enough. That is true. In this day and age of competition, you need optimizations and marketing strategies to help you drive traffic, engage your target audiences, and perform on search engines. In this section, we are going to outline five essential things that photography website owners need to make sure their platforms are a resounding success- 1. Limitless Storage- Remember how in the opening sections, we talked about the freedom to upload your photography portfolio and not be restricted in terms of sizes and resolutions? That is what a great website builder can help you with- infinite storage space. This allows you to upload your best work and not worry about the website slowing down or lacking performance. 2. Integration with Social Platforms- There is no denying the fact that social media is an important platform for professionals in the creative field. It is true that social platforms can play a critical part in your success. A good website builder allows you functionalities that help in integrating your social profiles- Facebook, Instagram, Snap, Pinterest, etc. This helps in diverting traffic to your website. 3. Search Engine Optimization- CSS and PHP websites require developers to go over every small detail to make sure that the website is SEO-friendly and optimized. With website builders, you do not have to worry about these things since the sites are already worked upon and SEO friendly. This will allow you to outperform your competitors on the SERPs and ensure that you get organic clicks and traffic. 4. Responsiveness with Mobile Devices- It is true that a majority of searches take place on mobile devices. With a website builder, you do not have to engage with manual optimizations to fit your design on mobile screens. This is something that is automatic in nature. Since a lot of your potential customers are going to find and engage with you on mobile devices, a website builder helps you completely here. 5. Digital Marketing and AI Integrations- Websites are more than just a set of codes. They are a representation of how customers behave, interact, and engage. The best website builder platforms have advanced digital marketing and AI integrations that help create a smart experience whenever someone visits your website. This allows you to manage a lot of the areas which would have required manual interference. If you are a photographer looking to build your first professional website, this is how you can get it done. The best part is that you do not have to be dependent on anyone to get your website up and running. This will allow you to focus and concentrate on other areas of your business. The Bottom Line Most creative professionals that we have spoken to, whether they be writers, photographers, or illustrators, point out that design and development agencies do not really get them. That is true. When it comes to the creative fields, a website is all about individuality and self-expression. When you build a photography website using a builder, you have complete freedom on how you want it to be. There is zero interference from someone telling you that this is wrong or that you shouldn’t be doing this. You can create a website that is ‘you’. If you have any other doubts regarding building your photography website, please let us know in the comments below. We will do our best to resolve all your queries as soon as possible. Till then- all the best to you and your photography website!
READ MOREDetailsSoftware Development Team
The development of any intellectual product is initially aimed at success in its implementation. In this regard, it is extremely important to ensure the proper quality of the software, application, or another result of the work. A properly selected Software development team is several professionals who can organize the work of creating software in a short time and at minimal cost to the investor, and also guarantee the relevance of the product. How to choose the correct development team? The level of professional training and work experience of specialists involved in the development of an intellectual product depends on the complexity of the work, as well as on the budget of the investor. Among all specialists actively offering their services on the market, development companies choose the following team members: 1. Universal specialists In the labor and services market, you can meet craftsmen who position themselves as highly qualified specialists who can solve any issues. As a rule, these people have extensive experience and knowledge in the matter under consideration. They can easily handle the development of a simple application. At the same time, when creating complex software, you will need deeper knowledge that generalists don’t possess. 2. Profile specialists These team members can be designers, programmers, content managers, or just engineers. They have the appropriate education and have extensive knowledge and experience in some competitive fields. They require the expert opinion, as well as full management of a specific part of the project, well-coordinated work in a team, and timely transfer of data and development results to related specialists. 3. Combined team Recruited to create the most complex applications or software. The team includes both generalists and specialized specialists. When developing an intellectual product, a horizontal control system is used. Each member of the team reports directly to the top management. When developing software, the worthwhile ideas of each employee are taken into account, and cross-checking is also provided. This project management technique is considered the most effective, as it allows you to minimize costs and achieve the expected results. Market experts and representatives of large IT companies recommend that when recruiting a team for a development team, ensure an approximately equal balance of generalists and specialized specialists. Moreover, each team must have either an official or an informal leader, who will be able to coordinate all tasks between other members of the collective. How to determine the optimal number of team members? There should be exactly enough team members to ensure the implementation of the project and the fulfillment of the technical task from the customer with the utmost accuracy, strictly on time. The following important factors influence the team size: The complexity of the task. The uniqueness of the development. Deadlines, defined by the customer and technical restrictions. The allocated budget for the implementation of the project by the investor. Provided resources to complete the task. In practice, to develop primitive software, no more than 2 – 4 people will be required. if it is necessary to implement a project of increased complexity, 7 or more team members may be required. What are the functions of team members? Most often, members of a pre-selected team perform the following roles in the development of a smart product: The key link is the investor or the customer of software development. It is he who provides information about what the final product should look like. Managing person – a team member who has experience in project management. He coordinates all specialists, combines ideas, draws up calendar schedules, conducts meetings, and issues final or intermediate results to the customer. The software architect is the most important specialized or generalist specialist. It provides the primary implementation of the general idea in strict accordance with the terms of reference. Subsequently, such a person is an assistant to the head, and he is sent for verification, as well as the assembly of all the developments of the work of the entire team. Engineers and ordinary developers – there may be several such members in the team. They are responsible for product development and software uptime. Designers – the area of responsibility of these specialists includes the design of attractive templates for users, as well as interfaces. Their work is related to how the product will be perceived by the end consumer. The main task of the designer is to create an easy-to-use and attractive product that will attract the interest of as many users as possible. The controller is a quality control engineer or an audit specialist. It checks the operability of the product, the compliance of the developments with the technical task, and also ensures the elimination of errors, which helps to improve the quality of the software. Analyst – a person who works in a team as an expert. He owns the needs of the market, as well as the industry for which the application is being developed. The demand for the software depends on this person, as well as its competitiveness, in comparison with other similar programs. Regardless of the assigned functions, the main degree of responsibility of the leader is to maintain a healthy spirit and friendly relations in the team. All team members should periodically come together for an online or face-to-face briefing, share results and problems. Upon discovering the first difficulties, each of the developers must notify all other team members about this. A focus on results is the main key to success. Requirements for the team in software development To achieve positive results, each team member must obey the internal regulations and follow the following important rules: Communication is carried out only in real-time, without delay in responding to a question or a task. All issues should be put up for public discussion – the principle of business transparency. All team members must trust each other. Each team member performs only their function. The composition of the team remains unchanged until the completion of development. In the collegiate discussion of questions, all of them are reflected on the board. Despite the above principles and examples, there is no single formula for creating an effective team in practice. To create a team, it is recommended to contact experts or recruitment agencies, and if the company already has the personnel, it is recommended to select developers not only according to the criteria of knowledge and experience but also according to the principle of psychological compatibility. An effective result is achieved only with a healthy spirit in the team and a competent distribution of tasks. Read Also: The Benefits Of Custom Software Development Ecommerce Software Development Trends Industrial Automation Software Development Big data software development services
READ MOREDetailsPopular

Technologies For Creating A Startup Idea
20 Feb 2023

How to Download Facebook Videos on Android?
07 Feb 2019

Getting Legal Advice from Immigration Attorneys
22 Dec 2021